Tee Shirts RedeuxAugust 23, 2024 When I see something I like a lot, I think, "Is it worth my time to do my variation on this?" Or "How much do I love this to do a variation on it?" Or "How long will it take me to do
this exactly how I want?" But sometimes, there's a tee shirt or a certain design or color that is appealing, and I know I can't copy it - well, I can, but that would infringe on an artist's creativity, and being an artist, I know how that is. Anyway, it's just better to buy it. It's usually $25 or so, with a lot of that going back to the museum or artist, so it's not an outlandish amount.
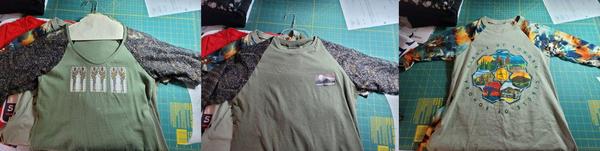
Yes, I know they're all green—more on green later—but needless to say, this is a look I'm working on to make my tees more shapely and functional in my wardrobe.
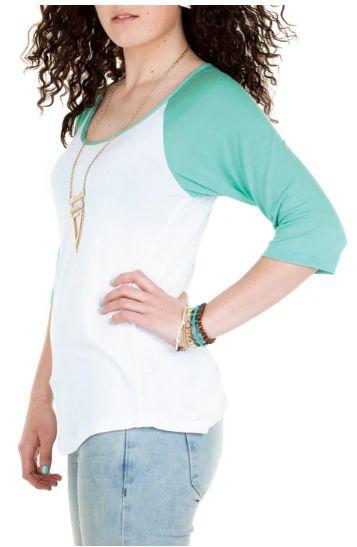
Toward that end, here is this fabulous pattern (and one of the worst-photographed patterns)
from Jalie - click on the pic for more info.
It covers all the points in fitting a top. I've always thought a Raglan sleeve to be a cop-out to the set-in sleeve that is so desperately needed. I posted briefly about this here, but I probably need to be more up-front and specific about this. The shoulder and FBA are the real changers for a lot of fitting problems. And, of course, the "hang from the shoulder." That said, the Raglan is an alternative for fixing the shoulder problem quickly. And, of course, my problem when buying a tee that fits is that I have to buy for my hips, which
means the shoulders and bust are gigantic.
So the Raglan works easily here in that I can't resize the tee; I can, but it's way more trouble than I want to go to. Here's where this Jalie 3245 (click the pic above to see more about this pattern) works. But it's got just more than the Raglan shoulder. It has a nice nip at the waist, and that hem curve is outstanding.
Here's my friend who has put Raglan Sleeves in her shirt (you can't see them because we got some fabric to match as precisely as possible). But it has raglan sleeves, and she has the shape and style of her tee. So, it's time to work on mine.
To start - all I can say is that it was a total box. It was a size XL - not because of my hips but because of the length. I
learned this the hard way with another tee project.
This tee was a large size, and you can see on the left (the actual photo) that it's just a smidgen too short. On the right, I morphed it to show how it looks a little better. I'm very sensitive about my hips because that's where I carry most of my weight.
This is the same photo, just lengthened on the right, and see how much smaller my hips look. It's just that little length that helps so much to make me look that much thinner. This is proportions working overtime here. Sometimes, it's a minimal amount added, subtracted, lengthened, or shortened that makes a garment sing. I've seen this happen so often, so the larger size will ensure I have the length I need for my tee-shirt redeux.
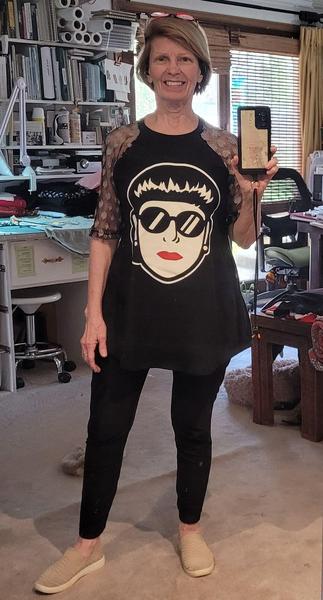
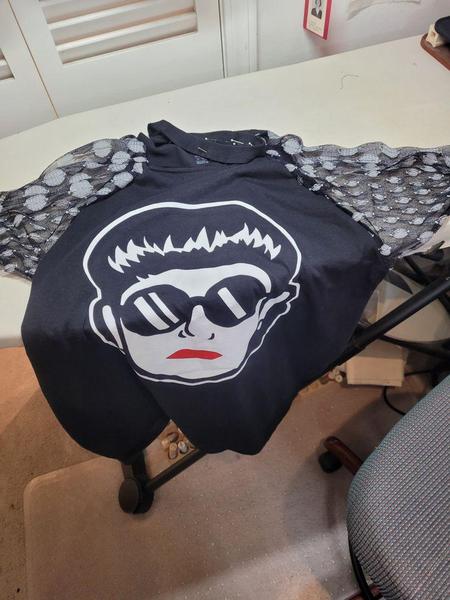
And here we go - great length and pretty snazzy! I picked out some sheer polka dots as they are about as classic and French as you can get, and Edith Head was nothing if not classic. And the length I need to make this look really
fabulous.
So how did I get there. I used Jalie 3245 and it's not that hard. When
you are transferring one design element (neck sleeve, hem - anything) from one pattern to another, you have three points you must match -
- Center Front or Center Back
- Bust Point/Waist height
- Shoulder point
And really the truth is that you don't really have to have that Bust or Waist height, but it's nice to pay attention to it. What you're looking for is your X and Y axis. Your X is usually your horizontal axis and the Y is your vertical.
So to put this more simply your Y axis is your Center Front or Center Back and your shoulder is your X axis.
Here's how this looks:
This shows very clearly that I'm parallel to the center front. This keeps this from being off-kilter and having Edith's head tilted on the end piece.
But where's the shoulder? In the Raglan, there really is no shoulder line, but there's
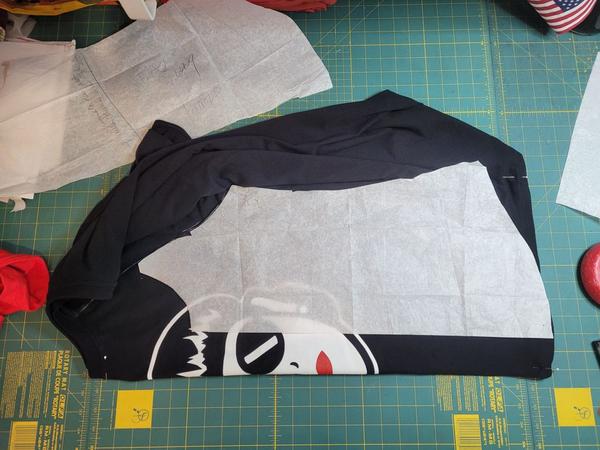
just as good a marking point on the X axis as the shoulder. That's the underarm - where the under sleeve seam meets the side seam in the sleeve seam. This is just as good as the shoulder. Above you can see that I'm parallel to the Center Front (the X axis is straight) and that I'm anchored on the underarm (making the Y axis [width/girth] matching. Actually, I want this to be as wide as possible so that I can then take it up to shape just the way I want.
Next I'm going to cut only that sleeve line - I'm going to cut the old sleeves off and put on the Raglin sleeve.
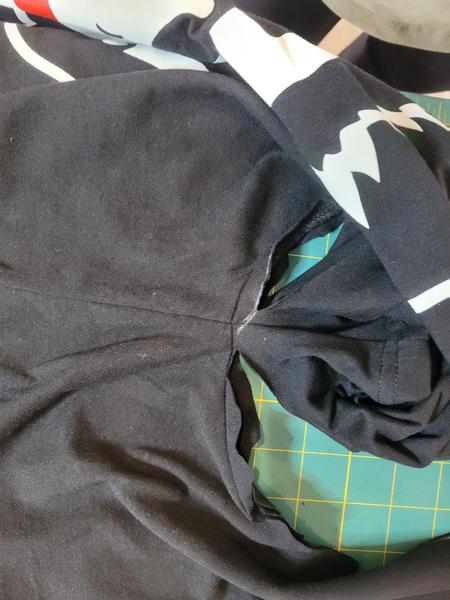
Here again, I'm parallel to the Center Back and matching that point at the underarm, and only cutting the sleeve seam alone. The Raglan sleeve top goes all the way to the collar. So the next thing is to make sure that I've got the old sleeves complete cut off.
I've missed a little at the bottom, so I need to cut that. After I've cut this. I'm finished with the front and back pattern pieces from Jalie 3245. Now I need to cut the rest of the old sleeve seam off, so I clean that up. Next, I have to remove the neckline where the Raglan sleeve will go in.
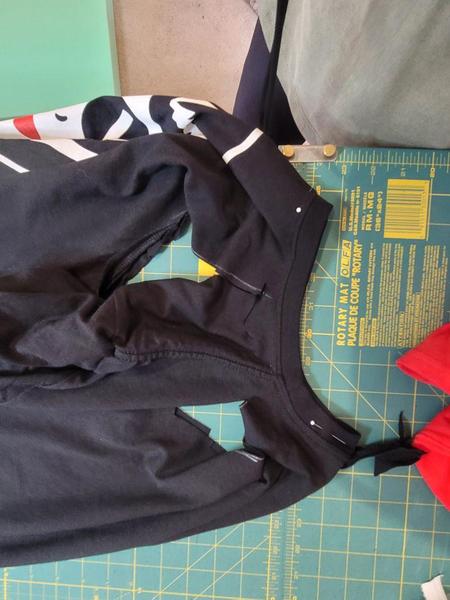
This is part of the old shoulder line, and this is easy to do. Remove the original tee shirt neckline around the banded knit at the top of the old shoulder line. Keep this neckline piece as much as possible because it will be the new neckline of the
redone tee. BTW, I like to save the sleeves for a little something else later. Now, it's time to cut Raglan sleeves. It helps to look at
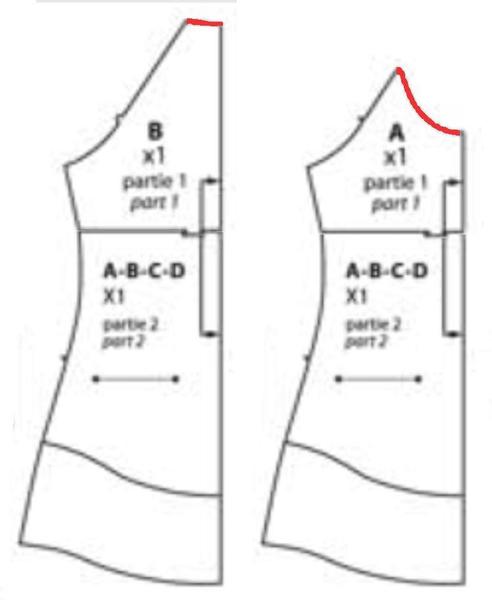
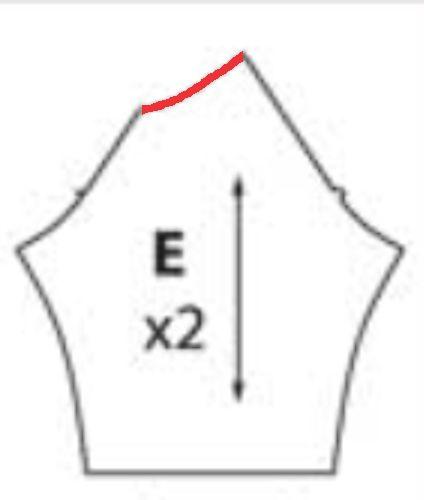
the pattern pieces, as sometimes a Raglan sleeve can be very confusing.
The red line marks where the neckline is and you can see that the back piece where the neckline is very high, and the front it's a lot lower - almost a scoop neck.
The red line marks again where the neckline is, and you can see from the notch markings on the sleeve seams that the front is a lot lower than the back sleeve seam. This is good to know cause I want to raise my front - I like something a little higher on me, which tells me I only need to raise the front side of the sleeve, and the back side will be just fine...like this:
This will make a more crew neck on the shirt rather than the scoop neck on the pattern. All we are doing here is raising that one side (the front side) at the same angle of the sleeve so that it will match (or come close) the higher neckline we want.
Why does this matter? Because this is the pattern, we're going to use to cut out the stretch lace to make the sleeves (the polka-dot fabric in the Edith Head Tee). I also need to shorten the ribbed neck fabric of the tee, which is fine. Usually, these RTW tees are made with the rib neck seam on the side, so the fabric will have already been removed, and that makes it easier to take up that seam in the neckline.
So I've got it all pinned and ready to go. I cut out about 4" in the neckline to bring it up, and that's fine with me.
A quick fit tells me I've got the neck and sleeves at the top in good and that I'm well on my way here. But goodness look at the shape in that body. The tee is huge on me now. I need to taper this in and add another little goodie to make this
look special. That means I'm nipping this in just above the waist and making this have some shape. On the sides, I need to copy that Jalie
3245 curve on the hem, and I need to add a little to the hem to give the bottom a slightly flared look. So I release the current Tee hem and cut just what the pattern calls for. Then I take one of those sleeves, and fold it the longest way possible - and yes that's on a bias, but I don't care. This is going to be a godet in the side seams so It won't really matter. After a few tucks and shaping on the side, adding the two godets in the side seams....
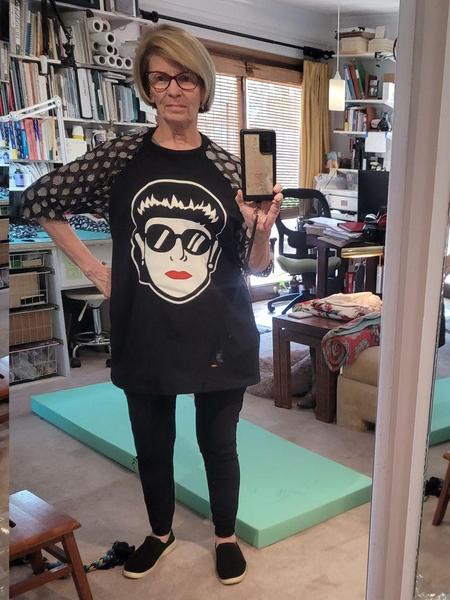
The neckline is fabulous, the hang is wonderful, the drape of the skirt is just what I need, the length is super, the silhouette is shapely and I'm done! I'll wear this a lot for the rest of the summer, and I am currently working on fixing some of my other
tees.
Don't let this scare you, and if nothing else, get that Jalie 3245 and mess with it. It has a myriad of variations—sleeveless (not for me) and shorter (not for me either). Work on raising the neckline to see how that looks on you.
Next thing you know, you'll be transforming your favorite tees into a real knock-out for your wardrobe!
The SewingArtistry Resource Library is designed to contain information to not only make your sewing better, but to aid in you fitting and flattering your shape, size and style. Check it out.
Look for future classes coming in 2024
The Core Pattern Shirt, (one of my favorites for woven core pattern that you can make into a myriad of different
garments),
Basic Knit Top (core pattern class for knit basic tops, shells, tees, dresses, and tunics)
|
Tracking a fashion trend isn't all that hard after seeing a few of them.
Living from Mid-Century Modern through Twiggy...
It's worth the time to look at these styles, particularly today as
there is a group of that wants to look....
This is the way fashion used to be -- pretty, flattering and I can't wait to make some of...
To view in browser along with past emails, click here. We respect your email privacy. |
|
|